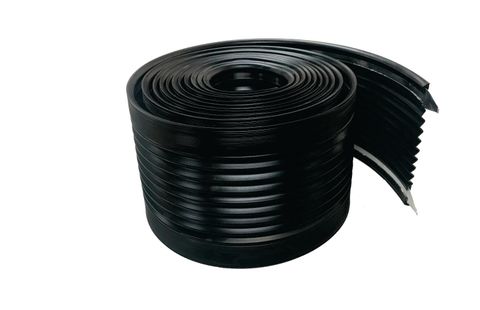
570150.1200 Black Expansion Strip Joints


Expansion Strip Joint has been designed as an expansion joint for Industrial Box gutters. It replaces the need to box the end of two adjoining gutters and to form a bridge to span the boxed ends. The biggest benefit, other than ease of installation, is that in the case of a blocked downpipe, any water can flow across to the adjoining gutter eliminating flooding. Expansion Strip Joint is available in widths of 145mm and 200mm in 5mtr long rolls.
For Expansion Joints in Box Gutters
1. It is important when fixing the expansion strip joint that the rivets fix the expansion joint to the box gutter only and do not come into contact with any materials underneath that are supporting the box gutter. Using a pencil or marker highlight on the box gutter where these supports are so that they can be avoiding when drilling holes for the rivets.
2. Clamp both the edges of the Expansion Strip Joint into position at the top of one of the vertical sides. Starting from this clamped side press the expansion joint down into the box gutter to conform to the shape of the gutter ensuring it is pressed firmly into corners of the box gutter by using a square object (e.g. piece of wood). Continue compression of the strip across the base of the box gutter, again ensuring it is pressed firmly into the corner, and up the opposite side and clamp at the top. Cut the strip flush with the top of the opposing vertical side of the box gutter
3. Hold the Expansion Strip Joint in place whilst drilling rivet holes. Place rivets temporarily in position as each hole is drilled as this will stop the flashing moving whilst subsequent holes.
4. Remove the flashing, pull out rivets and brush away any metal swarf.
5. Apply a neutral cure silicone bead along the line of rivet holes on both box gutters.
6. Place the expansion back into the gutter, insert all the rivets into the holes and press down to form a seal.
7. Complete the installation by fastening the rivets and removing rivet stems from the gutter.
• For use in joining box gutters in roofing applications.
• Equally suited to a variety of other applications where flashing between areas subject to high expansion, contraction and/or movement occurs.
• Equally suited to a variety of other applications where flashing between areas subject to high expansion, contraction and/or movement occurs.
| Size | Pack Type | Colour | Code |
|---|---|---|---|
| 145mm Wide x 5Mtr Roll |
|
||
| 200mm Wide x 5Mtr Roll |
|


